


 Bodno A10From $995
 Bodno A20From $1,595
 Bodno A30From $1,995
 Bodno A40 ProFrom $2,995
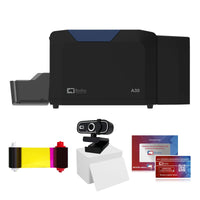 vs.
vs.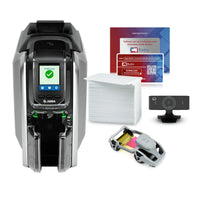

 CR80 30 mil PVC cardsFrom $3.99
 Adhesive-backed PVC cardsFrom $9.99
 Proximity cards (NoMativ)From $14.99
 NTAG NFC cards, 100 packFrom $59.00
 Buy the softwareDesign and print ID cards on PC and Mac


On this page
Updated September 14, 2026
Your Seaory S26 or S28 has an Ethernet port next to the USB port. Once it is on your network, any Windows PC or Mac in the office can add it as a network printer and share it. No USB cable at the desk, no computer tied to the printer.
Cable the printer to your router. Windows: run the Seaory driver setup, let the Configure Network Printer Tool find the printer, click Add Printer. Mac: Printers & Scanners → add by IP, address = the printer's IP followed by :5352, HP Jetdirect – Socket, Seaory driver.
Before you start
- Plug an Ethernet cable from the port on the back of the printer into your router or switch, and power the printer on. Check the printer’s current IP configuration; you may need to assign settings that match your network.
- Have the Seaory driver installer handy. It is on the USB drive that shipped with your Seaory printer. Windows uses the network tool built into the installer; Mac uses the driver it installs.
Configure the S26/S28 printer’s IP settings
The video shows USB-plus-Ethernet setup: connect both cables, open the network configuration tool, read the current settings, then apply an IP address, subnet mask and gateway suitable for your network. Use settings provided by your network administrator; do not copy the recorded numbers.
USB is used for the demonstrated configuration method and is not required at each workstation after Ethernet setup. Enter a plain IP address in the configuration tool; the Mac address-and-port entry below is a separate add-printer step.
On Windows: let the Seaory tool find the printer
You do not add the printer by hand. The Seaory driver installer ends with a Configure Network Printer Tool that searches the network, shows every Seaory printer it finds, and adds the one you pick.
On the last screen, Completing Seaory card printer driver Setup, click Finish. The Configure Network Printer Tool opens. Already have the driver installed? Run the setup again; it will take you to the same tool.
The tool searches automatically and lists what it finds: Model, Serial Number, IP Address and MAC Address. Write the IP address down, you will want it for any Mac.

Select the printer and click Assign IP address to configure a suitable static address, or ask your network administrator to reserve its address on the router. Keeping the address consistent helps prevent connection problems if network-assigned addresses change.
Windows now has it as a network printer. Print a test card to confirm.
On Mac: add it by IP address
From the USB drive that shipped with the printer. The next step needs it in the list.
Address: the printer's IP address followed by :5352, for example 10.10.1.31:5352. Protocol: HP Jetdirect – Socket. Queue: leave blank. Name: anything you like.

Seaory S26 or S28, matching your printer. Click OK, then Add.
Print a test card to confirm the connection.
Keeping it working
| Symptom | Cause and fix |
|---|---|
| Printer stopped responding after a router restart | Check whether its IP address changed. If it did, update the printer connection on the computer. A suitable static address or router reservation can help prevent this; a restart does not always change an address. |
| The Windows tool finds nothing | Check the cable and the link light on the printer's network port, make sure the PC is on the same network (not a guest Wi-Fi), and search again. |
| Prints from one computer but not another | Each computer adds the printer separately, using the same steps above. |
| Two jobs sent at once | The printer takes them one at a time. The second waits in the queue. |
Supplies for this job
Bodno Tech Support will finish it with you
Send a photo or a 20-second phone video and we can usually tell you the next step the same day. If your printer is covered by TotalCare, mention your order number and we will arrange the rest.
Call (732) 987-5300Email supportOpen a support requestGuide prepared with Seaory after-sales engineering. Updated September 14, 2026. Applies to Seaory S26 and S28 sold by Bodno.
Download it, activate it, or add another license. Activation codes arrive by email in 15 minutes.
