Register Your Printer
Activate your warranty, software, and personalized support
FAQ
Here’s a quick overview:
- 1. Unbox your printer
- 2. Register your printer (serial number required)
- 3. Connect the printer to your computer
- 4. Install ribbon and cards
- 5. Install printer driver
- 6. Activate Bodno software
- 7. Test your printer
- 8. Review essential maintenance tips
- 9. Confirm license level (Silver Edition or above)
- 10. Access support and training resources
Install the Printer Driver
Get the latest driver for smooth printing
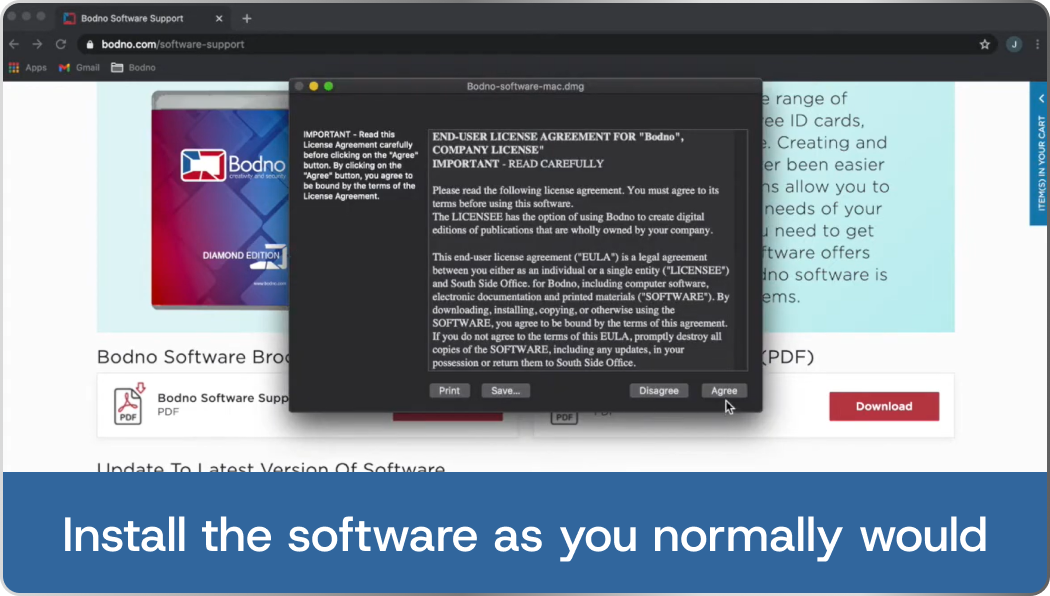
Download and install the correct driver for your printer
FAQ
Install and Activate Bodno Software
Unlock your software with your activation code
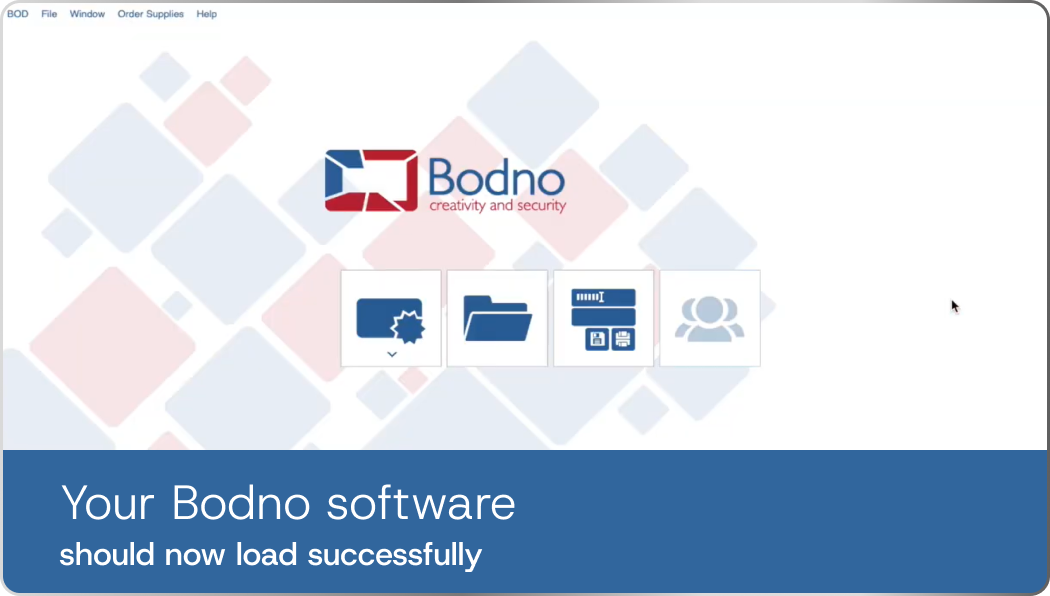
Install Bodno software, then enter the activation code below. We've also emailed it to you
Activation Code

FAQ

Unbox Your Printer
Let's ensure you've got everything you need. Carefully unpack your printer and confirm all listed items are included
Checklist modal items:
FAQ
Connect Your Printer
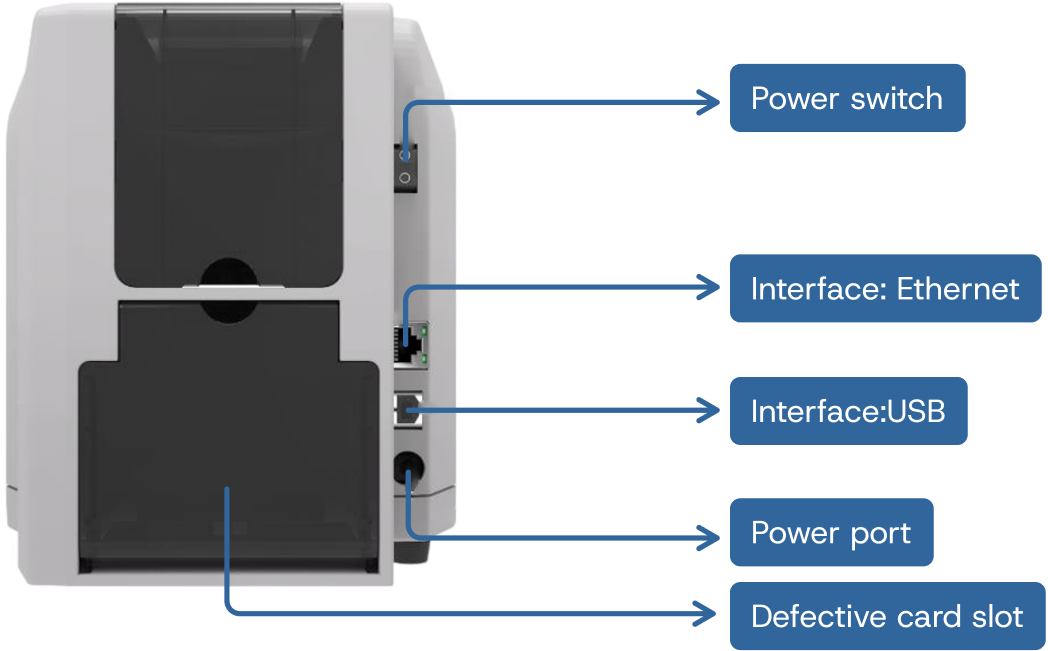
Plug printer directly into wall outlet. Do NOT use a surge protector or power strip. Then connect it to your computer with the provided USB cable. Place it securely on a flat surface.
Important:
Only use the original power cord, adapter, and USB cable. Third-party accessories may cause issues with power, connection, or print quality.
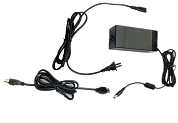
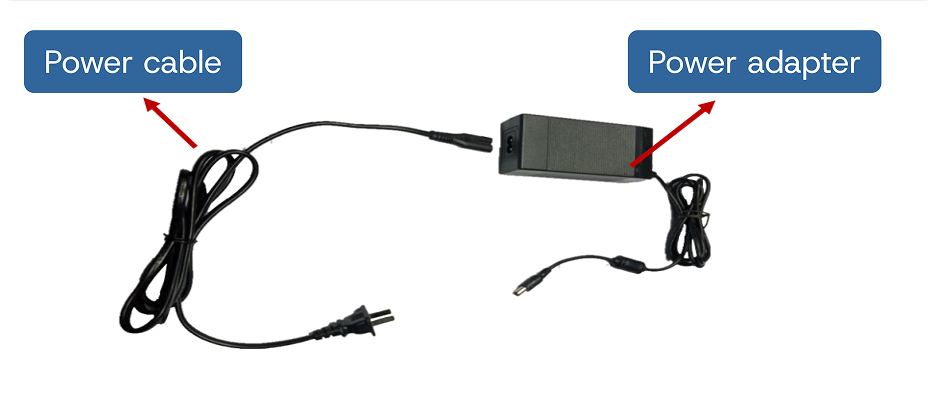
Step 1:
Take out the power cable and power adapter from the accessories box. Connected all cables as below picture.
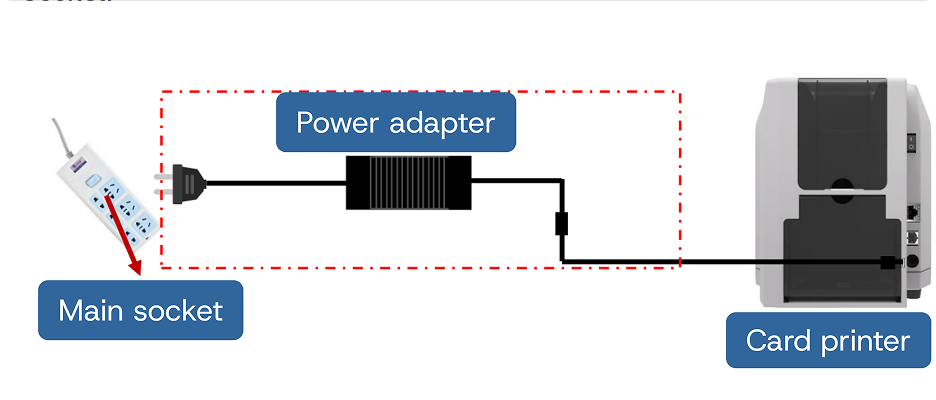
Step 2:
Take out the power cable and power adapter from the accessories box. Connected all cables as below picture.
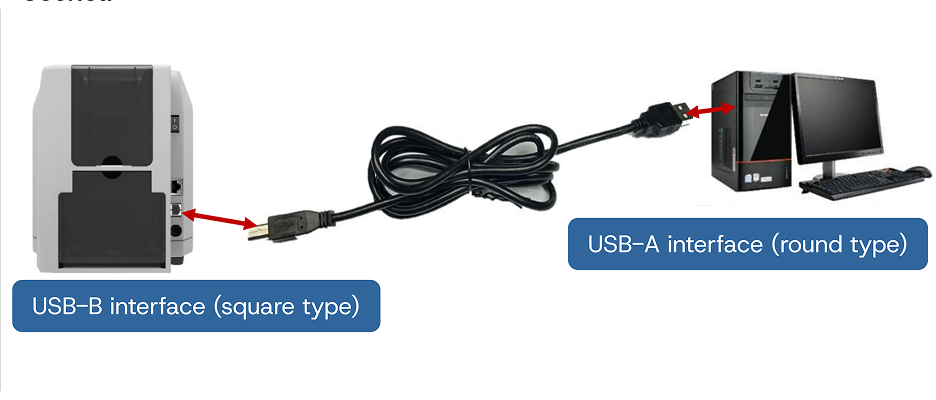
Step 3:
Take out the power cable and power adapter from the accessories box. Connected all cables as below picture.
FAQ
Install the Ribbon and Cards
Set up your ribbon and load cards properly. Follow the visual guide carefully to install your ribbon and cards, avoiding jams and errors.
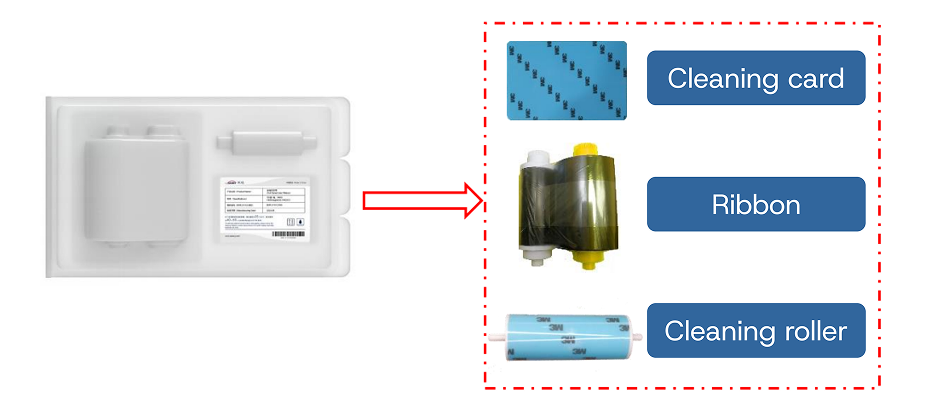
Step 1:
Open the ribbon box, take out the ribbon.
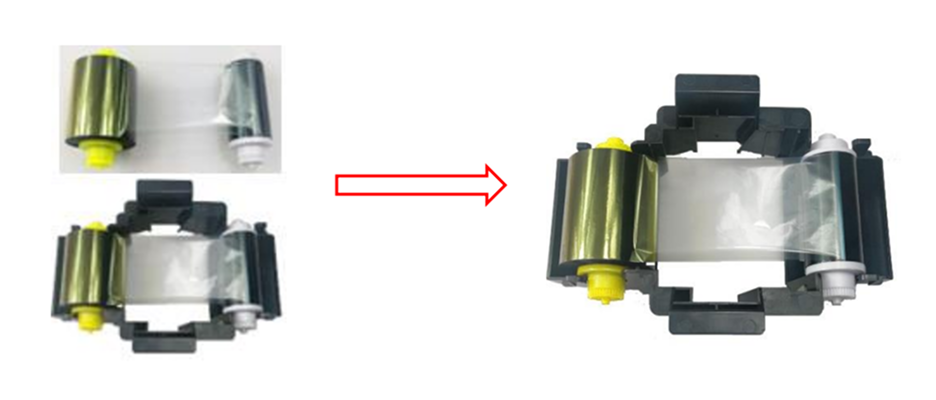
Step 2:
Install the ribbon into the cartridge according to the color direction.
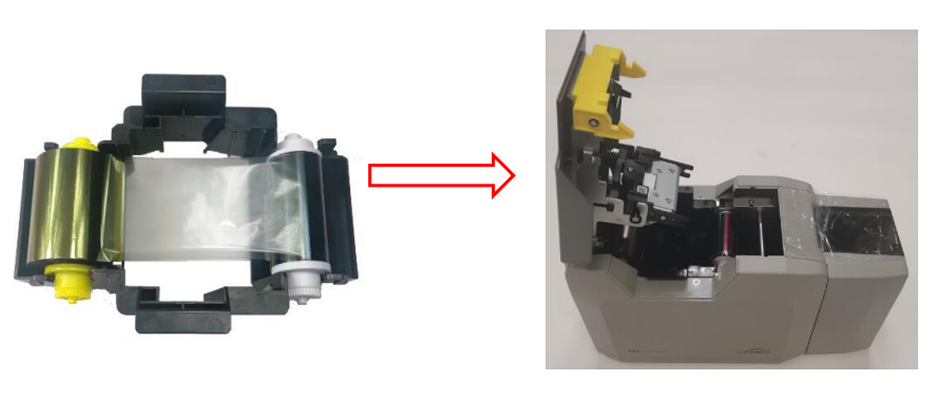
Step 3:
As shown in picture below, take ribbon cartridge’s side, install the ribbon cartridge and close the upper cover.
FAQ
Test Your Printer
Print your first test card. Check alignment, clarity, and color quality
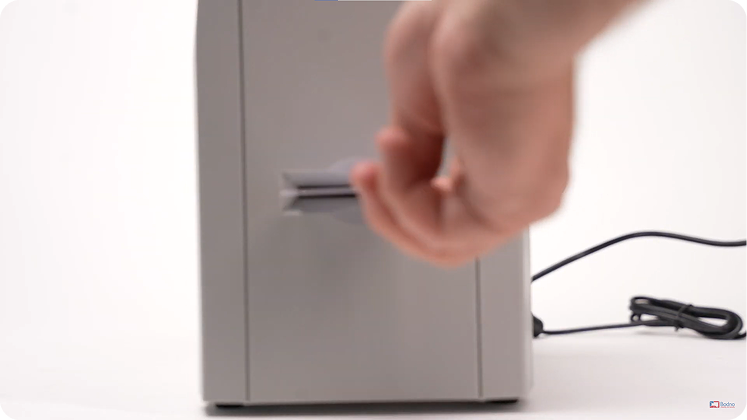
Step 1:
Turn on the printer.
Step 2:
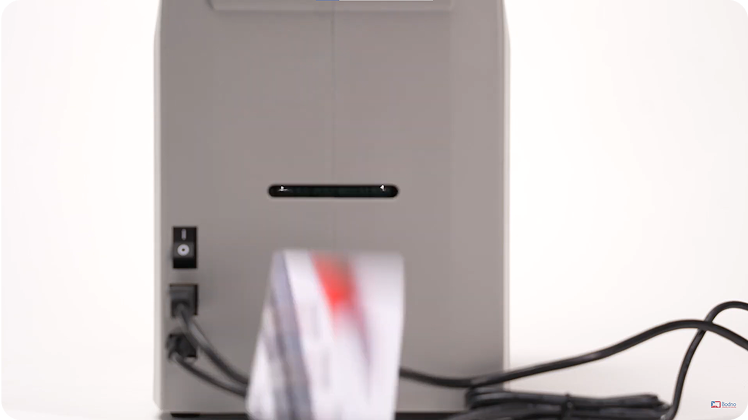
Press and hold the printer's front-panel button until the test card prints.
Step 3:
Verify that card prints correctly (colors, text clearly visible, no faded areas).
Having Trouble? Schedule Free Onboarding
Having Trouble?
Schedule Free Onboarding
FAQ
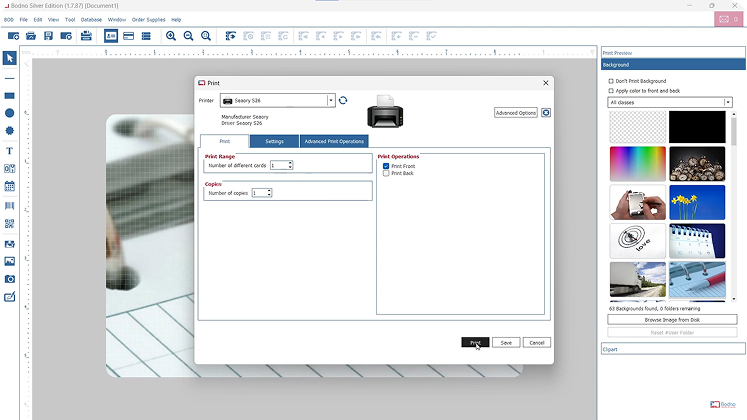
Create a new card design or select a template—you can add photos, logos, and text if you’d like.
Make sure your printer is connected and powered on. Go to the Print menu, select your printer, and adjust settings if needed.
Insert a blank card into the printer, then click “Print” to run your test card.
This confirms your setup is working and gives you a chance to see your first card come to life.
Start Designing Cards
Design professional-quality ID cards easily
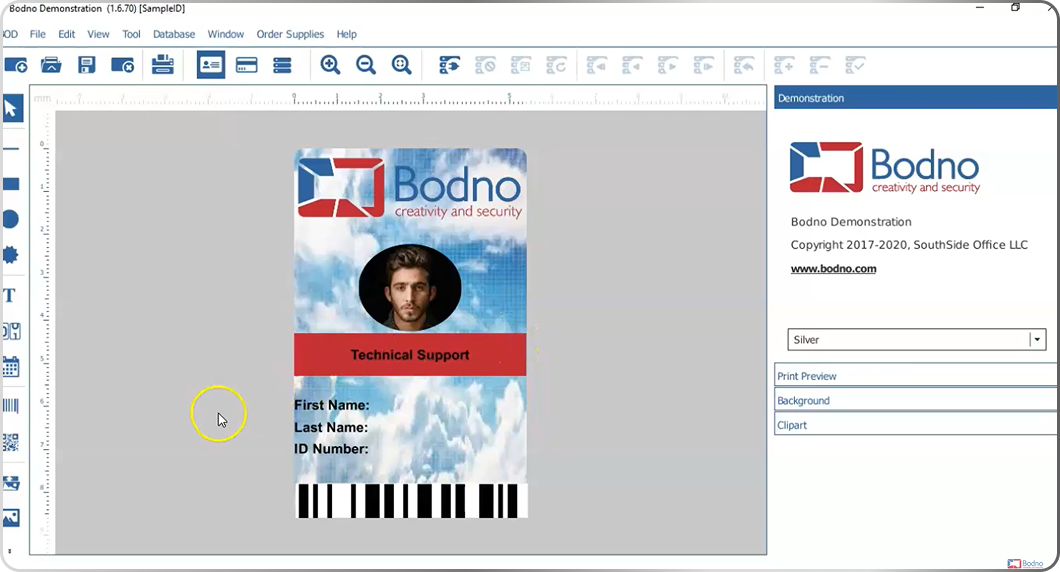
Your printer is ready! Explore templates or create custom designs
Step-by-Step Tutorials:
Designing Your ID Card and Setting Up the Database
Clear, step-by-step instructions for designing a basic ID card
Instructions for setting up the internal database

Don't have this Software? Upgrade Software Edition
Don't have this Software?
Upgrade Software Edition
Import Your Data from Excel or CSV
Easily import your names, photos, ID numbers, barcodes, or any other card data from Excel or CSV. This makes card printing fast and automated—no manual data entry required.
How to Import Data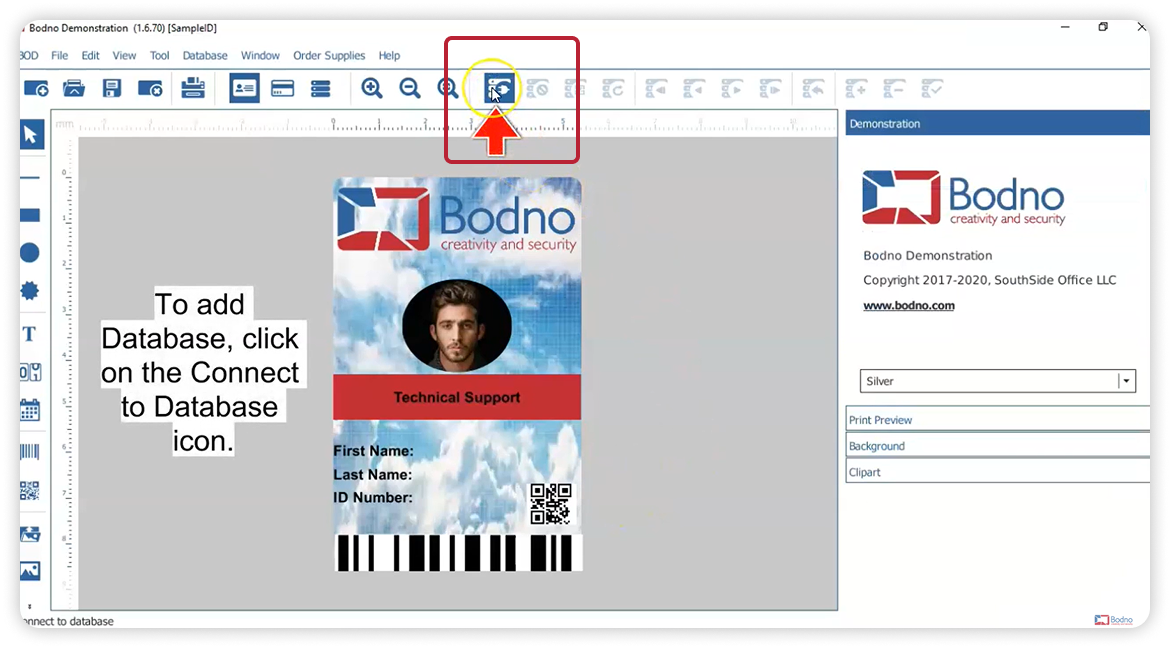
Follow The Instructions Step-by-Step
-
1. Click “Connect to Database” inside the Bodno software.
This button is usually found in the top toolbar under the Database tab.
-
2. Choose “Direct Excel File Driver”
This option lets you connect directly to your Excel spreadsheet without needing to convert or install anything else.
-
3. Browse and Select Your Excel File (.xlsx or .csv)
Once selected, click Next to continue.
-
4. Choose the Worksheet and Define the Header Row
Select the sheet you want to import.
-
Check the box if your first row contains column names (headers).
-
Set where your data starts (usually row 2).
-
-
5. Configure Column Data Types (if needed)
Most columns can be left as-is.
-
If you’re importing dates or times, make sure to manually set the column type to avoid formatting issues.
-
-
6. Select the Columns to Use
Pick the data fields you want to connect to your card layout (e.g., First Name, Photo, Barcode, etc.).
-
7. Assign a “Guide Column”
Choose one column to act as the unique identifier for each record—this is usually an ID number or email.
-
8. Finalize and Click “Finish”
Bodno will now link the database to your card project. You’ll see your data loaded in the record list.
Your Excel or CSV file *must remain closed* while working in Bodno, or the connection won't work
FAQ
However, Bodno does not support importing full design files like PDFs, Photoshop (.PSD), or Illustrator (.AI).
We also don’t recommend importing a full ID card image as a background—it may print in low quality or misalign. It’s always better to build your card using Bodno’s built-in tools for sharp, professional results.
Click “File → Save” and choose a location on your device. You can also save your files to Google Drive, OneDrive, or any other cloud service for easy access and backup.
We recommend saving often—especially if you're customizing multiple layouts or working across teams.
Using the Data on Your Card Design
Once connected, simply drag and drop any column field onto your card layout—names, photos, barcodes, etc.
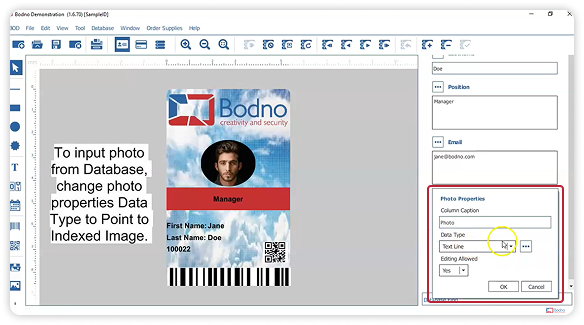
Want to add a photo?
Just drag the “Photo” column onto your design and it will auto-fill per record.
Essential Maintenance Tips
Keep your printer running smoothly
Regular cleaning prevents errors and ensures optimal print quality
Tip 1:
Clean your printer every time you change the ribbon
This is critical to avoid faded cards and damage to the printhead. Use the official cleaning kit and cleaning cards provided with your printer for optimal results.
Cleaning print head steps:
Deposition of dust or contaminants inside the card printer may cause damage to important parts and affect the printing effect. Therefore, it’s recommended to clean the printer when changing the ribbon or at least clean one time a month.
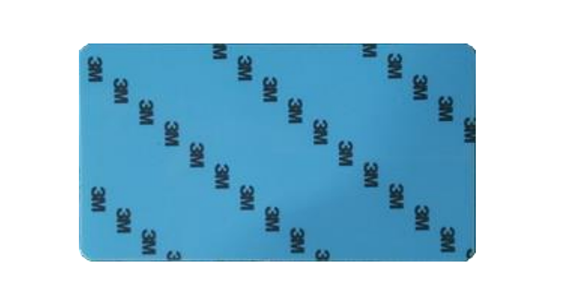
Step 1:
Take out the cleaning card from the accessory box and remove the 3M hyaline layer on cleaning card’s both sides and put it into input hopper.
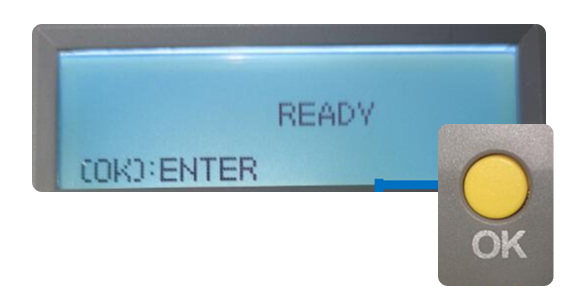
Step 2:
When Card printer shows “Ready”, press “OK” one time, then press “>” two times.
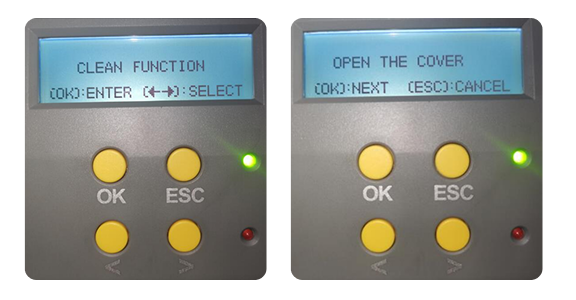
Step 3:
LCM show “Clean function” press “OK” one time. Then LCM will show “Open the cover”.
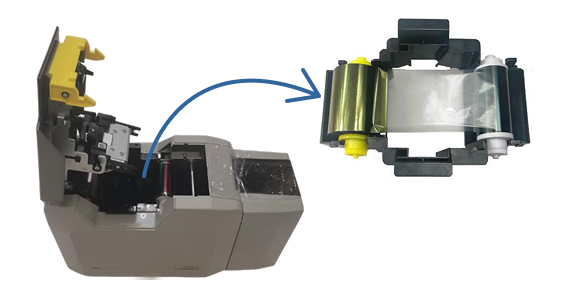
Step 4:
Open the cover, take out ribbon cartridge, and then close the upper cover.

Step 5:
Press “OK” one time. The card printer will start to cleaning.
Step 6:
The cleaning card will be exit from card exit mouth after finished cleaning. After it, please install the ribbon cartridge and close the upper cover.
Cleaning print head steps:
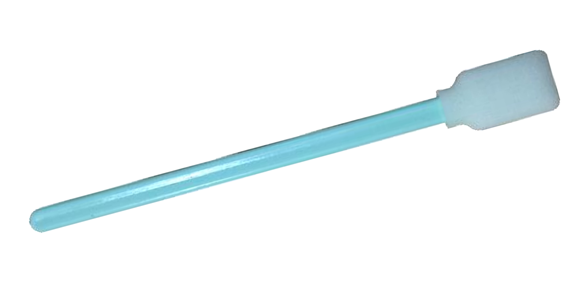
Step 1:
Take out cleaning stick from accessories box.
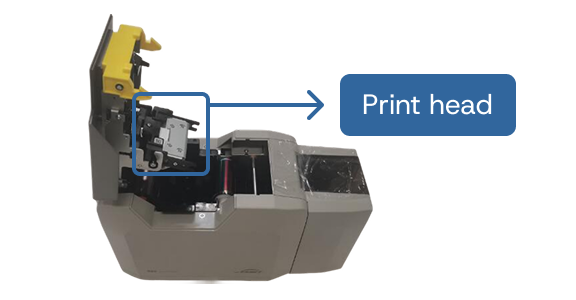
Step 2:
Turn off the card printer, open the upper cover and find the print head show in below picture.
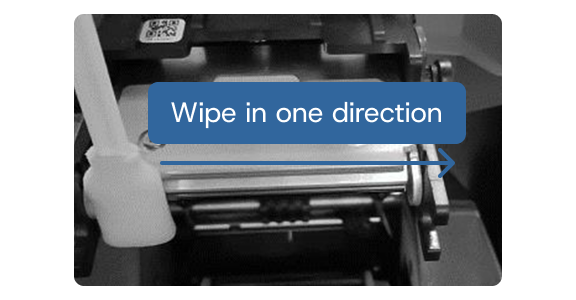
Step 3:
Wipe the print head in one direction, from left to right or right to left with cleaning stick. Do not wipe back and forth. Generally wipe 3-5 times will be ok.
Tip 2:
Proper Ribbon Replacement
1. Power off your printer.
2. Open the ribbon cover.
3. Remove the used ribbon and insert the new one, ensuring correct alignment.
4. Close the cover and restart the printer.
Use original ribbons only to maintain quality and avoid malfunctions.
Tip 3:
Faded Prints:
Check if the ribbon is properly installed.
Clean the printhead using a cleaning card.
Card Jams:
Remove any stuck cards carefully.
Ensure cards are properly loaded and are the correct type.
FAQ
Insert the cleaning card when prompted and follow the on-screen steps. The printer will automatically run a cleaning cycle.
Registration successful!
Your activation code will appear when installing your software.
Thank You
Thank you!
One of our printer specialists will be in touch shortly to discuss your needs and help you find the ideal printer solution
Bodno Bronze Edition:
Perfect for beginners in ID card printing. It’s easy to use and includes all the essential tools to create professional-looking cards quickly.
- Template card designs
- Windows & Mac compatibility
- 1D barcode printing
- Image editing
- Free software updates
- Card signatures
- Internal database storage for card reprinting
Bodno Silver Edition:
Popular choice for those seeking a more streamlined and efficient card printing process
- XLS, XLSX, CSV & TXT connection
- QR Codes
- Data Importing from Microsoft Excel
- Photo File Linking to Multiple Records
Bodno Gold Edition:
Powerful choice for those who require advanced customization options and expanded printing capabilities
- 2D Barcode printing capabilities
- Automatic Face Detection in Live Acquisition
- Automatic Face Cropping
- Image Acquisition through camera SDK
- Custom Features through Script
- MS Access and SQLite with Photo Field
- Ability to search query Records
- Photo and OLE Objects on Database Records
Bodno Platinum Edition:
Offers total control and customization for your ID card printing needs.
- Fingerprint Acquisition Scan
- Operations Logs and User Allowances with Audit Reporting
- Contact and contactless smartcard encoding (Windows-only)
- RFID encoding support (Windows-only)
- NFC encoding (Windows-only)
- Automatic print by DB update (Windows-only)
Bodno Diamond Edition:
Offers advanced features for large teams and high-level ID card printing needs.
- Web Print Server (Windows-only)
- Mifare CLASSIC & Ultralight (including NFC) (Windows-only)
- Net License up to 16 PCs belonging to the same scope and sub-net
Start Your 15-Minute Demo — Free & Easy
Expert Help with Your ID Printing Needs
Need a tailored ID solution for your organization? Our experts are here to help you choose the best option for your needs
Have questions before applying?
Fill out the quick form below and a Bodno specialist will get in touch to walk you through the best leasing option for your business.
Ultimate Beneficial Ownership
Who are the Ultimate Beneficial Owners (UBOs) for the customer on this Credit Application?
When you provide UBO information, you enable us to comply with Anti Money Laundering regulations. Please provide any UBO information received from your customer.
Review the three UBO types below and select the UBO type for this credit application:
- Ownership UBO: An individual, if any, who owns, directly or indirectly, more than 25 percent of the equity interests or Profit Sharing/Economic interest of the legal entity customer (e.g., each natural person that owns more than 25 percent of the shares of a corporation).
- Effective Control UBO: If ultimate beneficial owner cannot be determined based on ownership, please provide the information for the natural person with effective control (day-to-day decision-making).
- Board of Directors UBO: If neither of the above apply, please provide the information for all Board of Directors (BODs), Executive Management Team.
Thank you for submitting your details!
Your personalized quote is on the way!
Bodno TotalCare
![]()
-
5-Year Complete Coverage
Full protection from purchase date
-
Free 1-Day Shipping Both Ways
Easy and fast repair process
-
Fast Repair Turnaround
Typically completed in 3 business days
-
Free Parts & Labor
No hidden costs
-
Loaner Printer Provided
Your business continues uninterrupted


 Standard Blank PVC Cards
 Mylar Adhesive-Backed Cards
  Proximity Cards (Nomativ)
  NTAG Cards
  Software
 Upgrades
 Bodno Trial
 Ben King
 Benjamin Cohen
 Ciara Uychoco
 Eli Feig
 Jack Richter
 TotalCare
 Self Serve
 Printer Setup
 License Status

