


 Standard Blank PVC Cards
 Mylar Adhesive-Backed Cards
  Proximity Cards (Nomativ)
  NTAG Cards
  Software
 Upgrades
 Bodno Trial
 Renew
Renew Ben King
 Benjamin Cohen
 Ciara Uychoco
 Eli Feig
 Jack Richter
 TotalCare
 Self Serve
 Printer Setup
 License Status
 Find My Activation Code
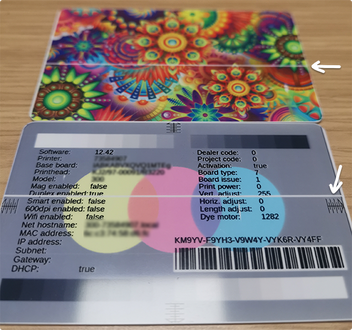
Seeing a perfectly straight white line on every card is stressful—especially when it stays in the exact same spot and won’t go away. In many cases, this pattern points to a printhead element that’s been physically damaged.
Cleaning still matters (a dirty printer can contribute to printhead damage), but if the line remains after proper cleaning and is confirmed as a printer-side defect, printhead replacement is typically the fix.
This article will help you:
• Clean first (the right way) so you don’t misdiagnose the issue
• Confirm whether the defect is coming from the printer (hardware) vs. your file/software
• Replace the printhead safely (Pronto 100 / 300 / 400X / 600 / D)
• Order the correct printhead for your model
• Reduce the chance of repeat printhead damage
Quick Diagnosis (30 seconds) — Clean First
Before you assume it’s a printhead, do a quick clean first:
• Run a proper cleaning using a cleaning kit (recommended).
• Then print again and check the result.
If the white line is still:
• perfectly straight, and
• in the exact same spot on every card,
…move to the confirmation step below.
Step 1 (60 seconds): Confirm it’s not your file, software, or settings
The fastest way to confirm a printer-side defect is to print the printer’s internal Test Card (if your model supports it). Internal test cards print without your computer, design file, or software.
If the white line is:
• in the same spot on every card, and
• also appears on the printer’s internal Test Card,
…then the cause is inside the printer (hardware).
If you’re not sure how to print an internal Test Card on your exact model, contact us and we’ll guide you for your specific Magicard printer.
Why a perfectly straight line often points to the printhead
Inside your Magicard printer, the printhead is a long row of tiny heating elements aligned straight across the width of the card. As the card moves through the printer, the printhead heats the ribbon to transfer dye onto the card—line by line.
When one heating element (or a small group) becomes damaged, that exact spot can’t apply heat properly anymore. As the card keeps moving through the printer, the same area keeps missing print in the same position—creating a clean, unbroken straight white line.
Common causes (prevention-focused)
In many cases, something gets dragged between the card and the printhead—dust, debris, or contamination—and it can permanently damage the printhead surface or heating elements.
Common causes we often see:
• Skipped cleanings / dirty printer
• Dusty environment
• Contaminated cards (cards left out on desks/surfaces)
• Dirty rollers
• Ribbon left exposed (collects dust when left out)
• Sticky cleaning roller not maintained (where applicable)
• Pre-punched cards (jagged edges can scratch — punch after printing, not before)
• Accidental contact while changing ribbon (rings/jewelry can nick the printhead)
The key truth (so you don’t waste time)
If the internal Test Card shows the same perfectly straight white line, the printhead is usually physically damaged and replacement is the fix.
You should clean first (and clean before installing anything new), but cleaning will not restore a physically damaged heating element.
What to do next (in the right order)
1) Do a thorough clean first
Even if the printhead is already damaged, cleaning is still important—because you don’t want to install a new printhead into a dirty printer and risk damaging the replacement.
How to Replace the Printhead (Pronto 100 / 300 / 400X / 600 / D)
If your internal Test Card shows the same perfectly straight white line, replacing the printhead is typically the fix.
Before you start (30 seconds)
• Finish any print jobs
• Work on a clean surface
• Avoid touching the printhead’s printing edge (thermal surface)
Step-by-step
-
Power down fully
Shut the printer down properly, then unplug the power supply from the printer. -
Open the lid
Lift the lid to access the dye film (ribbon) and printhead area. -
Remove the dye film (ribbon)
Remove the dye film so you have clear access to the printhead. -
Unclip the static drain wire (if present)
If your printer has a small static drain wire clipped near the printhead, unclip it. -
Remove the old printhead
Push the printhead back slightly so it can slide up and out of the housing.
Carefully disconnect the printhead cable from the printhead.
Lift the old printhead out and set it aside. -
Install the new printhead
Take the new printhead out of its packaging.
Firmly reconnect the printhead cable to the new printhead.
Slide the printhead back into the housing until it seats evenly.
Re-clip the static drain wire (if applicable). -
Close and power on
Close the lid, reconnect power, and turn the printer on.
Wait for the printer to initialize fully.
Final check: Print a test card
Print another internal Test Card. If the line is gone, you’re done.
Which Printhead Do I Need?
Magicard 300 / 400X / 600 / D
Printhead: FG/3652-3160-2
Magicard Pronto 100
Printhead: FG/3100-0160
Still not sure? We’ll confirm it for you
If you tell us your printer model and confirm whether the white line appears on the internal Test Card, we’ll point you to the correct printhead and next step.
Bodno Technical Support: support@bodno.com


