


 Standard Blank PVC Cards
 Mylar Adhesive-Backed Cards
  Proximity Cards (Nomativ)
  NTAG Cards
  Software
 Upgrades
 Bodno Trial
 Renew
Renew Ben King
 Benjamin Cohen
 Ciara Uychoco
 Eli Feig
 Jack Richter
 TotalCare
 Self Serve
 Printer Setup
 License Status
 Find My Activation Code
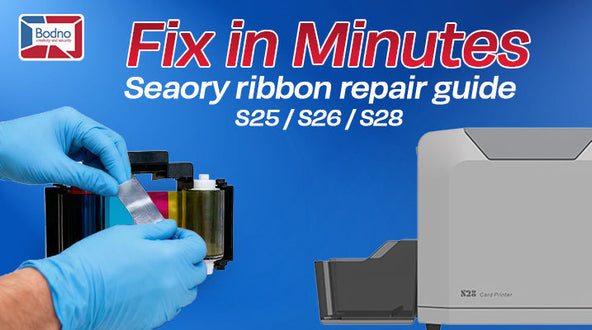
Torn or Broken Ribbon on Your Seaory S25 / S26 / S28?
Here’s the fast, easy fix (no new ribbon needed).
Quick summary – what to do

If your Seaory stops with any error (Ribbon Error, Card Error, “Check Ribbon”, red light, etc.) and you open the cover and see the ribbon snapped or loose:
-
Turn the printer off and remove the ribbon cartridge.
-
Wind the ribbon so the broken section sits in the middle of the frame.
-
Line up the two ends (not twisted), with the dull / back side facing up.
-
Tape the back side only using a small strip of clear tape, edge-to-edge.
-
Wind to remove slack, reinstall the cartridge, close the cover, and print a test card.
In most cases, the ribbon prints normally again.
No need for a new ribbon, no need for overnight shipping—you’re back in business in a few minutes.
Why this happens (and why it’s not a disaster)
A torn or broken ribbon can trigger different messages:
-
Ribbon Error
-
Panel Error
-
Cover Open
-
Card Error
-
Or just a red light / fault
It looks serious, but most of the time it’s just:
-
A clean snap in the middle of the film
-
Caused by a quick tension spike, often from:
-
A card jam or rough edge
-
A card not feeding smoothly
-
The cover opened mid-print
-
As long as the ribbon isn’t shredded or burned, it’s usually fully repairable with tape.
Our Bodno techs fix Seaory S25 / S26 / S28 ribbons this way all the time—once it’s taped, the printer simply feeds past the joint and prints normally.
Good to know: Seaory ribbons include a few extra print panels from the factory, so losing one taped panel or one test card is expected and not a big deal.
When taping is OK (most of the time)
You can safely tape and keep using the ribbon when:
-
The break is a clean snap across the middle
-
Ribbon edges are mostly straight, not frayed into strings
-
The rest of the roll looks smooth, without burned or crumpled areas
This is what you’ll see in the majority of cases.
When to replace the ribbon
Swap in a new ribbon if:
-
A large area is burned, melted, or badly wrinkled
If you’re unsure, it’s fine to try the tape repair first. If it works, you save the ribbon. If it doesn’t, you were going to change it anyway.
What you’ll need
-
The Seaory ribbon cartridge (S25 / S26 / S28)
-
A small piece of clear office tape
-
Scissors (optional, to trim rough edges)
-
Clean, dry hands
Step 1 – Power down and remove the ribbon
-
Cancel or finish the current job.
-
Turn the printer off.
-
Open the top cover.
-
Lift out the ribbon cartridge gently and place it on a clean surface.
Step 2 – Move the break into the center
-
Find the gears on the ends of the ribbon spools (orange/white).
-
Slowly turn the gears to wind the ribbon.
-
Position the broken section across the open middle of the cartridge so you can easily work on it, with a bit of slack.
Step 3 – Prepare the ribbon ends

-
Gently separate the two broken ends.
-
If edges are jagged or curled, trim off a tiny piece so both are straight.
-
Check that the ribbon is not twisted:
-
The shiny print side is on the same side for both ends.
-
The dull back side is on the same side.
-
Touch the edges of the ribbon only to avoid fingerprints in the print area.
Step 4 – Tape the ribbon (back side only)

-
Lay both ends so the dull / non-printing side faces up.
-
Bring edges together so they just meet – no overlap.
-
Cut a narrow strip of clear tape, just wider than the ribbon.
-
Place the tape across the joint on the back side and press gently so it’s flat and smooth.
Very important:
-
Do not tape the shiny print side – this can transfer to cards and harm the printhead.
-
Keep the taped area thin and flat so it feeds cleanly.
Step 5 – Re-tension the ribbon
-
Use the gears to slowly wind the ribbon so the taped joint moves onto the take-up side.
-
Wind until the ribbon is snug and straight between the spools:
-
No big sag
-
Not overly tight
-
-
Make sure the taped joint looks flat, without a big crease.
-
If there’s a wrinkle, unwind slightly and re-tension.
-
Step 6 – Reinstall and test
-
Put the repaired cartridge back into the printer, fully seated in its guides.
-
Close the top cover until it clicks.
-
Turn the printer on.
-
Load a few blank cards and print a test card.
Check that:
-
No new ribbon or card errors appear
-
Colors and panels look normal
You might see a tiny defect on one card where the tape passes the printhead. After that, the rest of the roll should print normally, helped by the extra panels built into the ribbon.