


 Standard Blank PVC Cards
 Mylar Adhesive-Backed Cards
  Proximity Cards (Nomativ)
  NTAG Cards
  Software
 Upgrades
 Bodno Trial
 Renew
Renew Ben King
 Benjamin Cohen
 Ciara Uychoco
 Eli Feig
 Jack Richter
 TotalCare
 Self Serve
 Printer Setup
 License Status
 Find My Activation Code
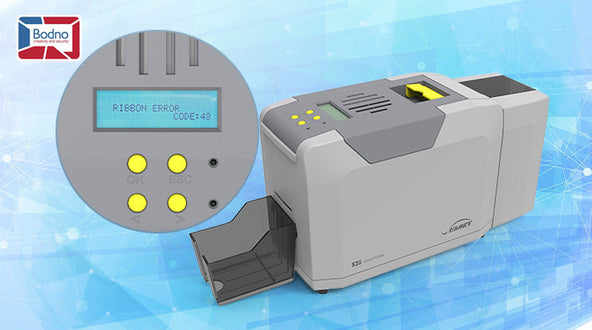
Code 48 looks scary, but it’s usually a simple calibration issue. In most cases, you’ll clear it in under a minute by calibrating the Ribbon LED. If that doesn’t do it, follow the quick sequence below.
Best First Fix (Most Cases)
1) Calibrate the Ribbon LED (fastest win)
Windows

MAC

Windows and MAC
Do this first—it resolves a huge portion of Code 48 cases.
-
Remove the ribbon and close the cover.
- On Windows: Devices & Printers → [Seaory printer] → Printing Preferences → Tool tab → Calibrate Ribbon LED → Calibrate (confirm in the pop-up).
- On Mac: Settings → Printers & Scanners → click the Seaory printer icon → Options & Supplies → Utility tab → Printer Utilities → select Other Tools in the left sidebar → click Calibrate Ribbon LED.
-
Expected reading: about ~195 (±20).
What the result means:
-
If it succeeds and shows ~195±20 → Re-install the ribbon and print. You’re done.
-
If it fails but shows ≥130 → clean optics (below) and calibrate again.
-
If it shows <100 → do the LED bracket quick reset (next section).
-
If it shows 0 → skip to Level 3 (sensor cable/sensor).
Small nudge: Even if you’re in a rush, this calibration is the fastest path back to printing.
2) 1-Second Fix: Re-seat the Ribbon LED Bracket (very common)

If you ever installed the ribbon in the wrong path (especially under the printhead) and then forced the cover closed, the little LED bracket can get bumped out of alignment.
What happens when this occurs:
The printer’s upper ribbon LED and the lower sensor stop lining up perfectly. The printer “can’t see” the ribbon panels clearly, and Code 48 shows up.
How to fix it (super easy)
-
Open the top cover.
-
Lift/raise the printhead.
-
Look for the black Ribbon LED bracket / holder near the top LED area.
-
If it looks slightly tilted, lifted, or not seated evenly:
-
Gently push it back down / re-seat it so it sits at the normal angle.
-
The goal is simple: it should sit straight and centered so the LED lines up with the lower sensor.
-
-
Now repeat: Calibrate Ribbon LED (with ribbon removed) and print.
This is a “seconds” fix—and it’s one of the most common real-world causes when calibration won’t succeed or reads low.
If Those Two Didn’t Clear It, Continue Here
Level 1 — Fast Basics (start here)
1) Torn ribbon? (most common quick win)

-
Open top cover → remove ribbon → inspect.
-
If torn: butt-join the ends; apply a single thin tape on the shiny/top side; wind the splice ~10 cm onto the white take-up spool; reinstall; test print.
This alone resolves many Code 48 cases.
2) Clean the optics (LED + sensor)

-
Power OFF. Open cover; lift head.
-
Gently clean the upper ribbon LED (“ribbon light”) on the head and the lower photosensor (“sensor light”) on the base; let dry 30–60 s.
Level 2 — Mechanical Alignment (common if Level 1 didn’t fix it)
4) Realign the ribbon-LED bracket (if bent/out of place)
-
What to check: Open cover and verify the guide rods of the ribbon-light holder are symmetrically engaged in the grooves on both sides of the printhead. If not, the holder is deformed (often from closing the lid on a mis-routed ribbon).
-
Fix (factory method): Re-seat/straighten so the holder is centered and the rods are correctly engaged; if needed, remove the print head to reposition the lamp holder. Re-calibrate afterward.
Level 3 — Advanced (only if Levels 1–2 didn’t resolve it)

5) Sensor cable / sensor module
-
Tell-tale: Calibration shows 0 on one/both values.
-
Judgment: With ribbon removed and cover closed, run calibration—0 = cable or sensor abnormal. Confirm blue + green LEDs are lit (green can be subtle). Optional: press a phone flashlight on the sensor and read with a repair tool; >100 implies the path is good.
-
Fix: Unplug/replug the ribbon sensor cable at both ends; if continuity fails (multimeter) or reading stays ≤10, replace the cable; if still bad, replace the sensor.
6) Debris in ribbon drive gears (supply/take-up)
-
Check: Disassemble enough to hand-turn the ribbon drive gears; any jamming = debris.
-
Fix: Remove the foreign object; re-test.
7) Ribbon motor / motor cable
-
Check: With ribbon installed correctly, power on; during self-test, both ribbon drive gears should rotate synchronously.
-
Fix: If a motor is unresponsive, inspect/replace the motor cable; if cable is good and no motion, replace the ribbon drive motor.
8) Core (“Key”) board contact (rare)
-
Fix: If all else passes, reseat the core/key board on the mainboard; if still unresolved, escalate to manufacturer support.
One-Screen Decision Map
-
Ribbon torn? Splice + wind ~10 cm onto white take-up → test.
-
Clean LED + sensor → Calibrate (no ribbon) → expect ~195±20.
-
≥130 & fail → better clean → recalibrate.
-
<100 → fix LED bracket.
-
0 → sensor cable/sensor path.
-
-
Still failing → clear gear debris → check/replace motor/cable → reseat core board.
Close-Out & Prevention
Verify: Re-run Calibrate Ribbon LED (no ribbon) and confirm ~195±20; print a test card.
Avoid repeats:
-
Don’t route the ribbon under the head or force the lid—this deforms the bracket.
-
At each ribbon change, do a quick wipe of LED + sensor.
FAQ
Do I need to ship the printer in or call support?
No. The factory flow is designed for on-site resolution. Follow Levels 1 → 2 → 3 in order; nearly all cases clear without a return.
Does this apply to S-series and R-series?
Yes. These same steps apply to S25/S26/S28 and R330/R660 models. (Sequence and thresholds are identical.)
Need help?
If you’ve finished Level 3 and still see Code 48, we’re happy to look at photos/logs and advise the next part to swap.
Bodno Tech Support: (732) 987-5300
Email: support@bodno.com
Live Chat: available on bodno.com during business hours
We’ll get you printing again—no return required.


