Summary
This technote will show you the necessary steps to add or remove design layers.
Step-by-Step
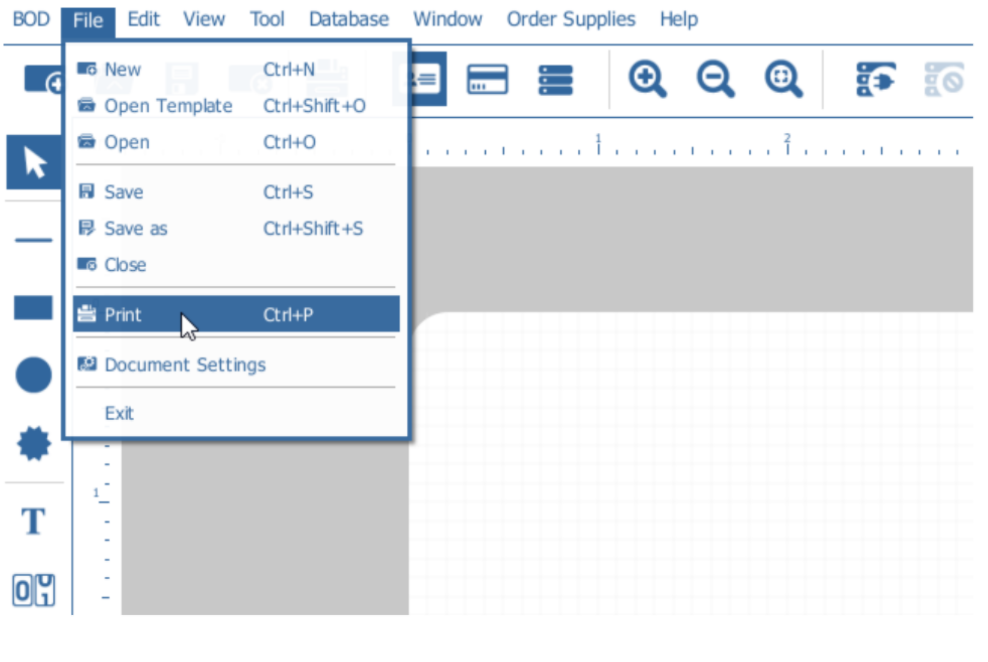
1. Go to File and select Print

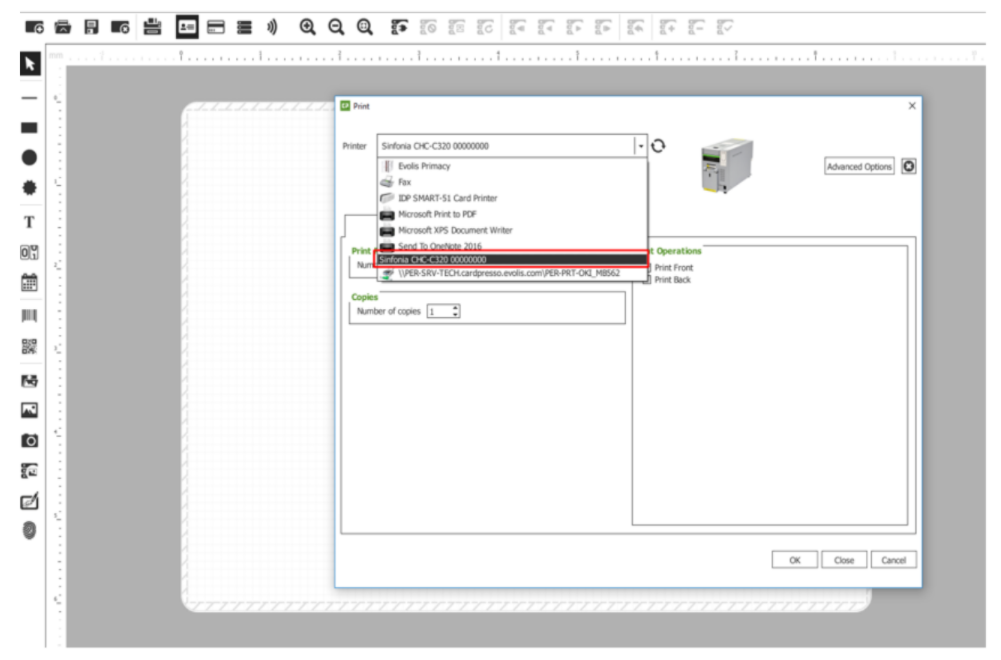
2. Select a printer that supports distinct layers, like the Sinfonia C320.

3. Go to the Settings tab.

4. In the Print Options area, scroll to the Layers section. Here you can choose to add or remove print layers.

a. Disabled - No Design tab for this layer
b. Front - Layer will be available for design only on the front side of the card.
c. Back - Layer will be available for design only on the back side of the card.
d. Both - Layer will be available for design on both sides of the card.
5. To navigate between different design layers, use the tab on the bottom-left corner of the design area.

If you have further questions, please don't hesitate to email Support@Bodno.com.


